Key Takeaways
- Simple Valentine’s Day nails are easy to recreate at home, even if you’re new to DIY manicures.
- Minimal designs like tiny hearts, soft pinks, and French tips feel festive without being overdone.
- Using non-toxic nail polish helps reduce exposure to harsh chemicals while still achieving a polished, long-lasting Valentine’s look.
Valentine’s Day is the perfect excuse to treat yourself and your nails are one of the easiest ways to do it. You do not need a salon appointment, fancy tools, or serious nail skills to get a cute, festive look.
Simple Valentine’s Day nails focus on small details that make a big difference. A soft pink, a classic red, or a tiny heart can instantly make your manicure feel fun and on theme without going over the top. These are the kinds of nail designs you can actually do at home, even if painting your nails is not your strong point.
This article shares easy and stylish Valentine’s Day nail ideas that anyone can try. Whether you want something subtle or playful, simple nail designs can still feel special, polished, and totally doable.
Why Choose Simple Valentine’s Day Nails?
Simple Valentine’s Day nails are perfect if you want something cute without spending hours or a lot of money. These designs are quick to do, easy to fix, and much less stressful than detailed nail art. If you are new to doing your nails at home, simple styles are the best place to start.
Another big plus is how versatile simple nail designs are. A soft pink or red manicure works just as well for a Valentine’s dinner as it does for everyday wear. You can keep things subtle and still feel festive without committing to anything too bold.
Simple does not mean boring. Minimal designs, such as tiny hearts, clean lines, or a hint of shimmer, can appear polished and intentional. Sometimes the most eye-catching nails are the ones that keep things clean and effortless.
15 Simple Valentine’s Day Nail Ideas
Polished but Playful

This is the “running errands but still cute” mani. The mix of glossy reds with tiny heart/dot details looks put-together from far away, and extra adorable up close.
How-to
- Paint 2–3 nails a deep red (two thin coats).
- Paint the remaining nails a sheer blush/nude base (two coats).
- On the nude nails, add tiny red dots and mini hearts (toothpick or dotting tool).
- Let everything dry fully, then seal with a glossy top coat.
Paris Café Micro-Hearts
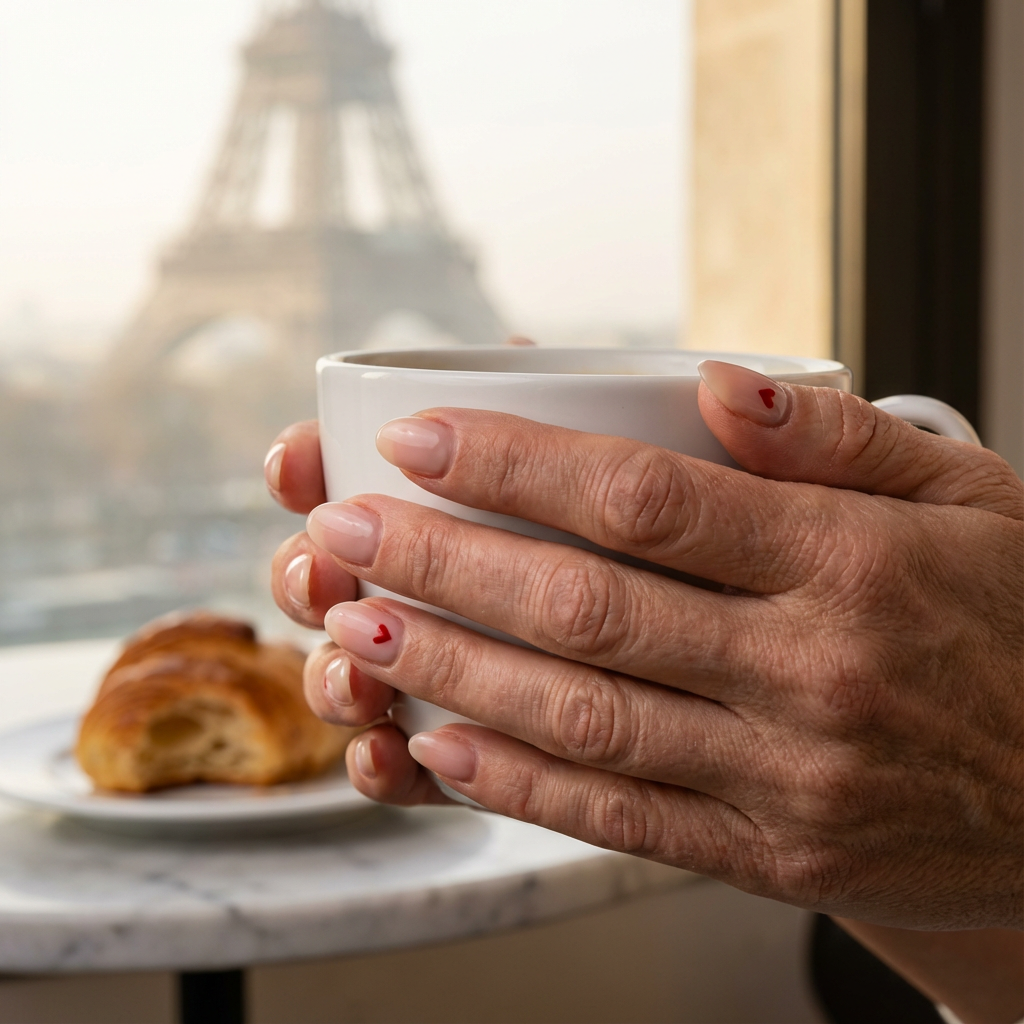
Soft, clean, and romantic in the most effortless way. It’s basically “French girl Valentine” — minimal nails with tiny hearts that still feel special.
How-to
- Apply a sheer nude or milky pink base (two thin coats).
- With a toothpick, place two tiny red dots side-by-side.
- Drag the dots slightly downward into a point to form a mini heart.
- Add 1–2 hearts total per hand (or one per nail if you want more).
- Finish with glossy top coat.
Queen of Hearts
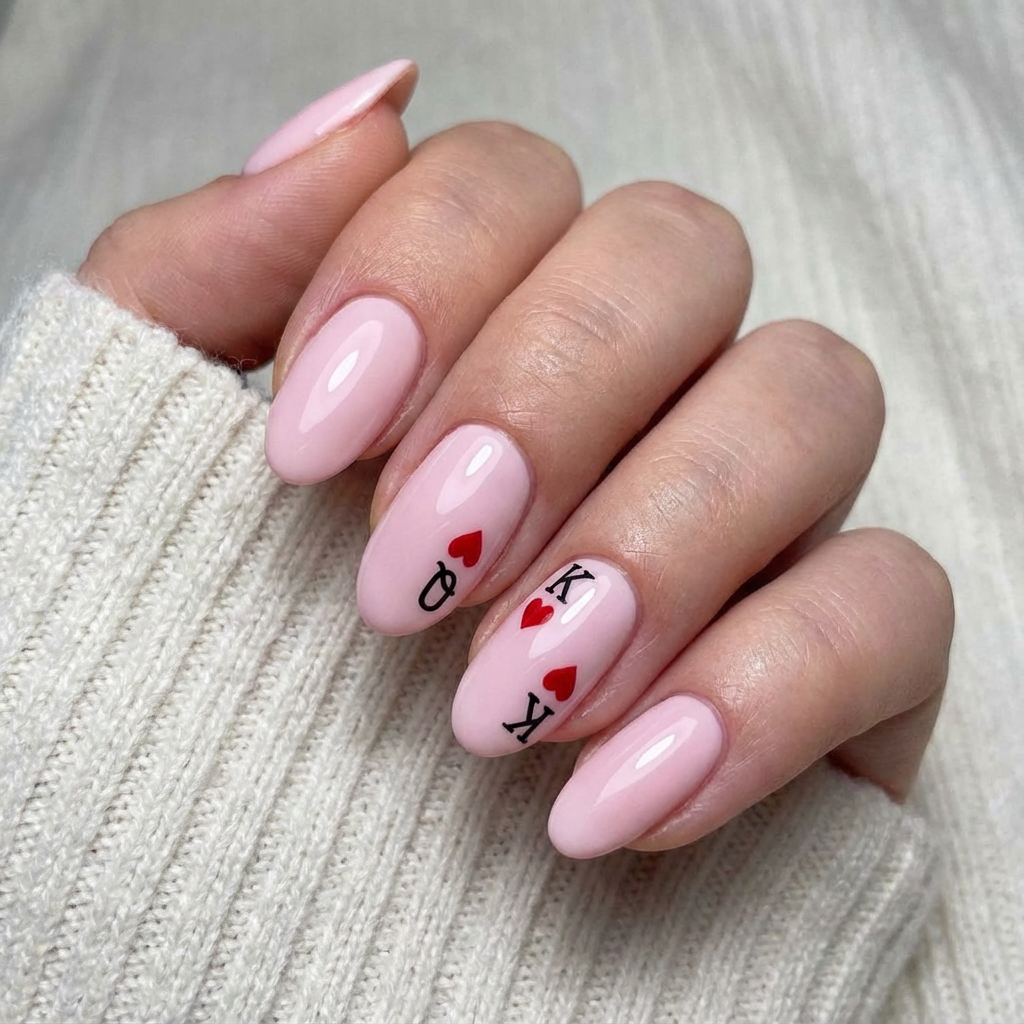
This design is inspired by classic playing cards, with subtle King and Queen details that give it a flirty, high-fashion twist. The soft pink base keeps everything clean and wearable, while the tiny red hearts and card symbols make it feel playful without crossing into novelty.
It’s the kind of Valentine’s nail look that feels clever and elevated, like an inside joke only you notice.
How-to
- Paint all nails with a sheer or milky soft pink polish (two thin coats for a smooth, glossy base).
- Choose one or two accent nails for the design and let the polish fully dry.
- Using a fine nail art brush or nail stickers, add small black playing card symbols like K and Q, keeping them minimal and well spaced.
- Add tiny red heart details near the letters to reference classic card suits.
- Step back and check placement so the design feels balanced and intentional.
- Finish with a glossy top coat to seal everything in and smooth the surface.
Cherry French Tip Moment
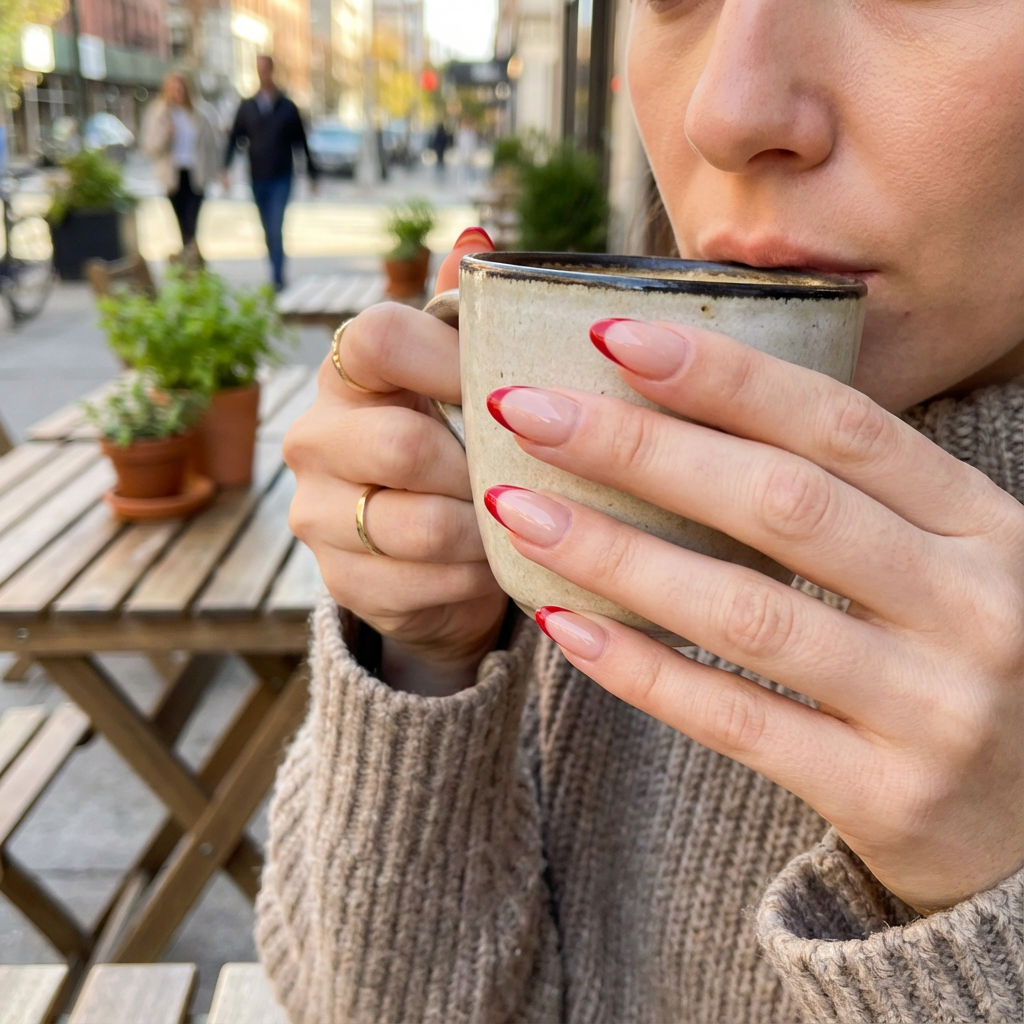
French tips are also one of the easiest styles to customize. You can keep things subtle with pink French tips on almond nails, or add a playful touch with tiny hearts or white heart accents along the tip line. For a more modern take, V-shape French tips or a pointed French manicure create a sharper, fashion-forward look that still feels Valentine-appropriate.
If you like a little extra detail, a chrome finish on the tips or delicate chrome bows on an accent nail can elevate the design without making it feel busy. Even darker shades like a burgundy mani or a soft black lace manicure-inspired tip can work beautifully when paired with a sheer base.
How-to
- Apply a nude or sheer pink base using two thin coats.
- Use tip guides or tape to mark the smile line or V-shape.
- Paint the tips cherry red, soft pink, or burgundy using thin layers.
- Add optional accents like tiny hearts near the tip or a single heart on one accent nail.
- Peel guides while the polish is still slightly tacky for clean lines.
- Finish with a glossy top coat to seal and smooth the design.
Peekaboo Heart Faces
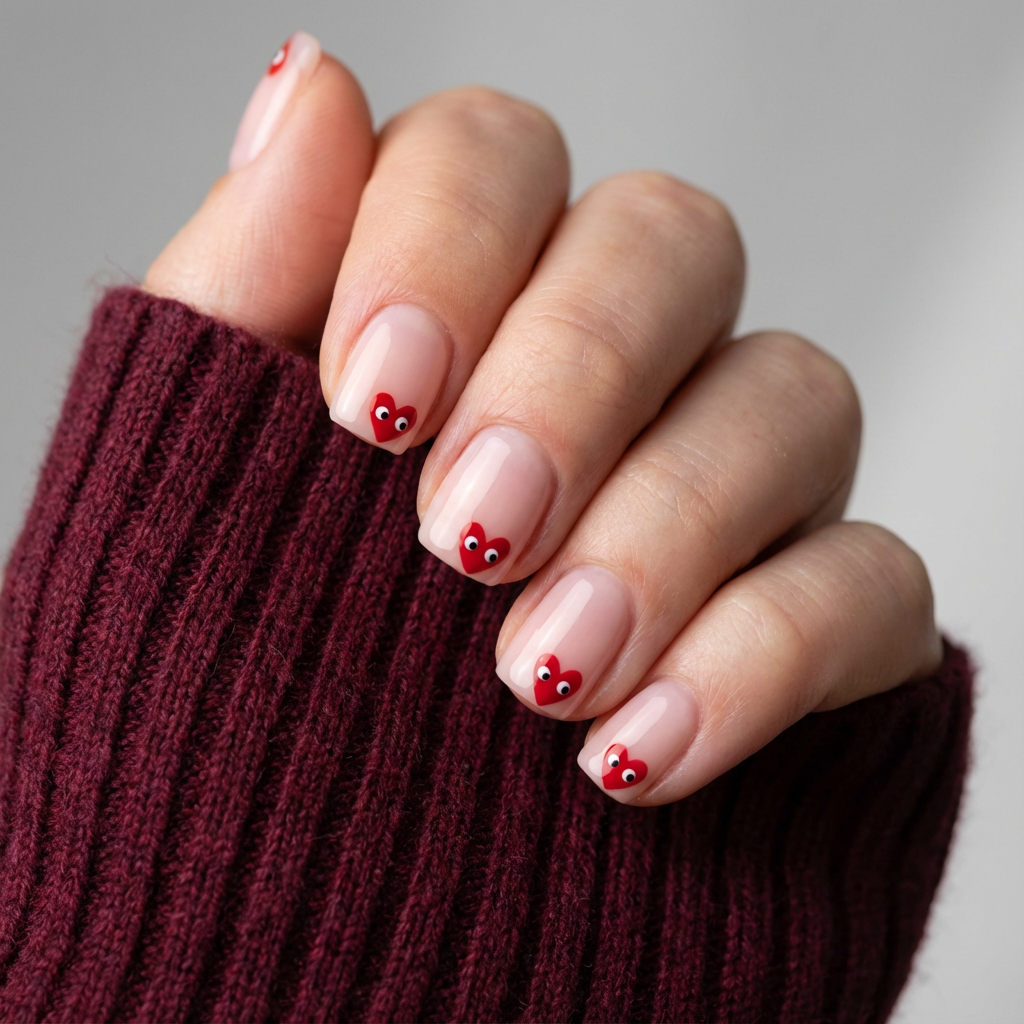
These are giving “cute but cheeky.” The little heart “faces” are adorable, unexpected, and still super simple to recreate.
How-to
- Paint a sheer nude base (two coats).
- At the tip of each nail, paint a small red heart shape.
- Add two white dots on the heart, then tiny black dots inside for eyes.
- Let dry completely.
- Seal with top coat.
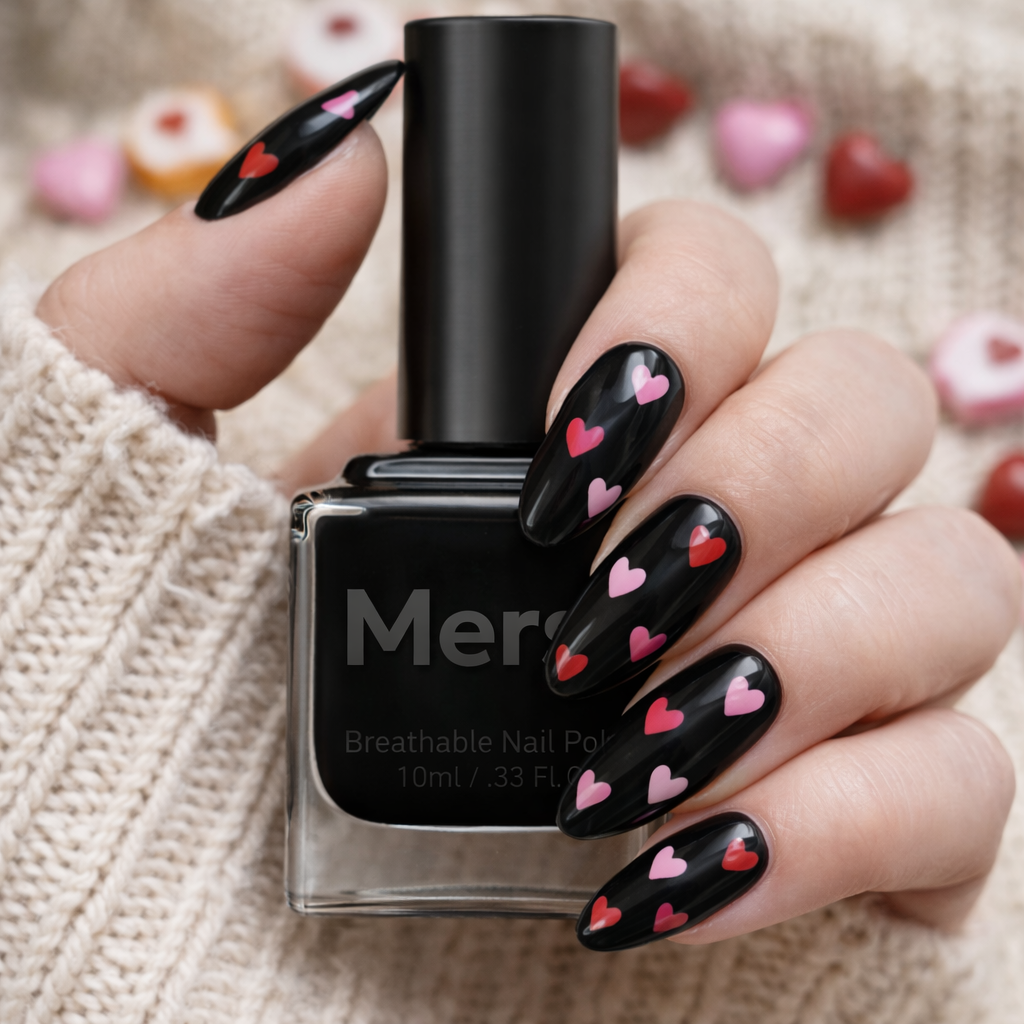
Midnight Heart Toss
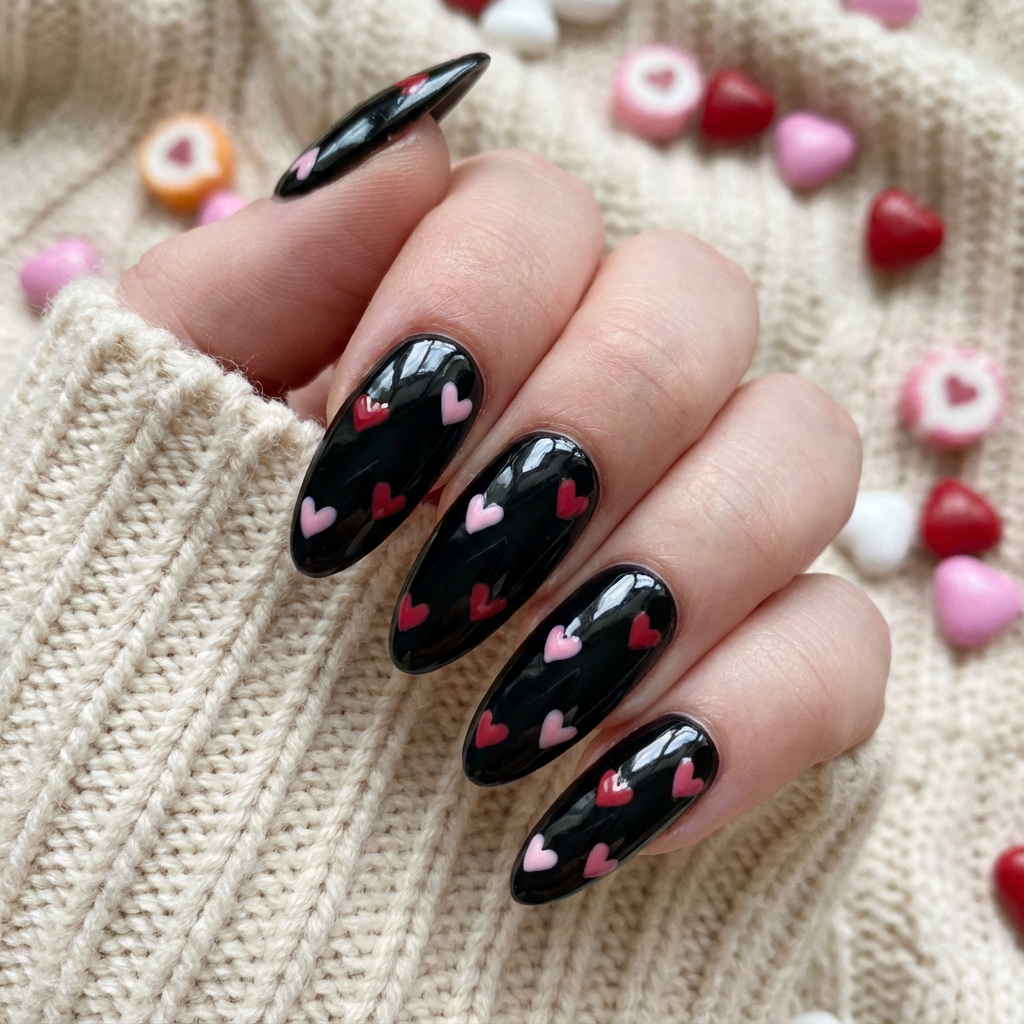
This is your bold Valentine era. The scattered hearts feel fun and flirty, but the overall look stays sleek and fashion-y.
How-to
- Paint nails a glossy dark base (two coats).
- With a dotting tool, create tiny hearts using pink + red (two dots + pull into a point).
- Scatter hearts diagonally so they look “tossed,” not lined up.
- Add a second pass to sharpen heart edges if needed.
- Finish with a thick glossy top coat.
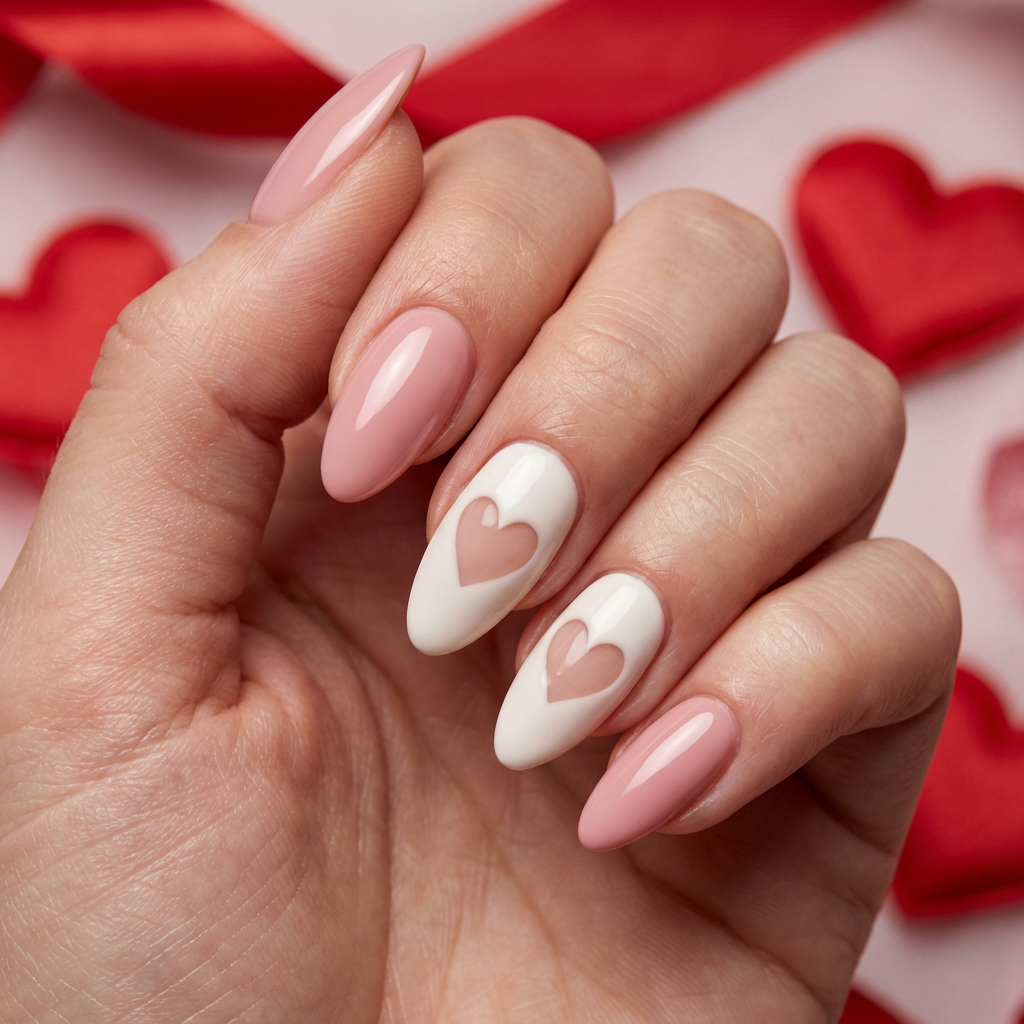
Sweetheart Centerpieces
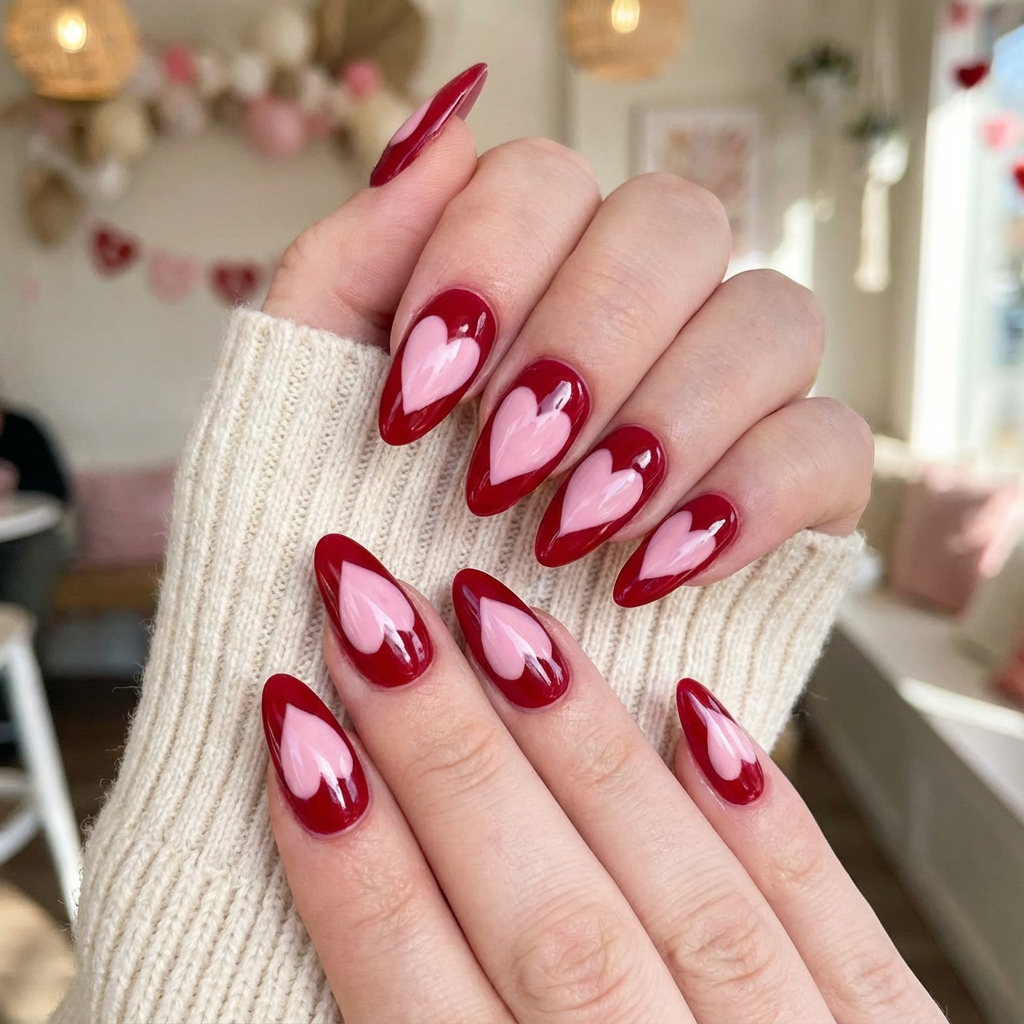
This is the “I’m the gift” manicure. Those big glossy hearts look like salon nail art, but it’s totally doable if you take it slow.
How-to
- Paint nails a deep wine red base (two coats).
- Once dry, paint a large blush-pink heart centered on each nail.
- Do a second coat on the heart for full opacity.
- Clean edges with a tiny brush dipped in remover.
- Seal with glossy top coat.
Cozy Mini-Hearts
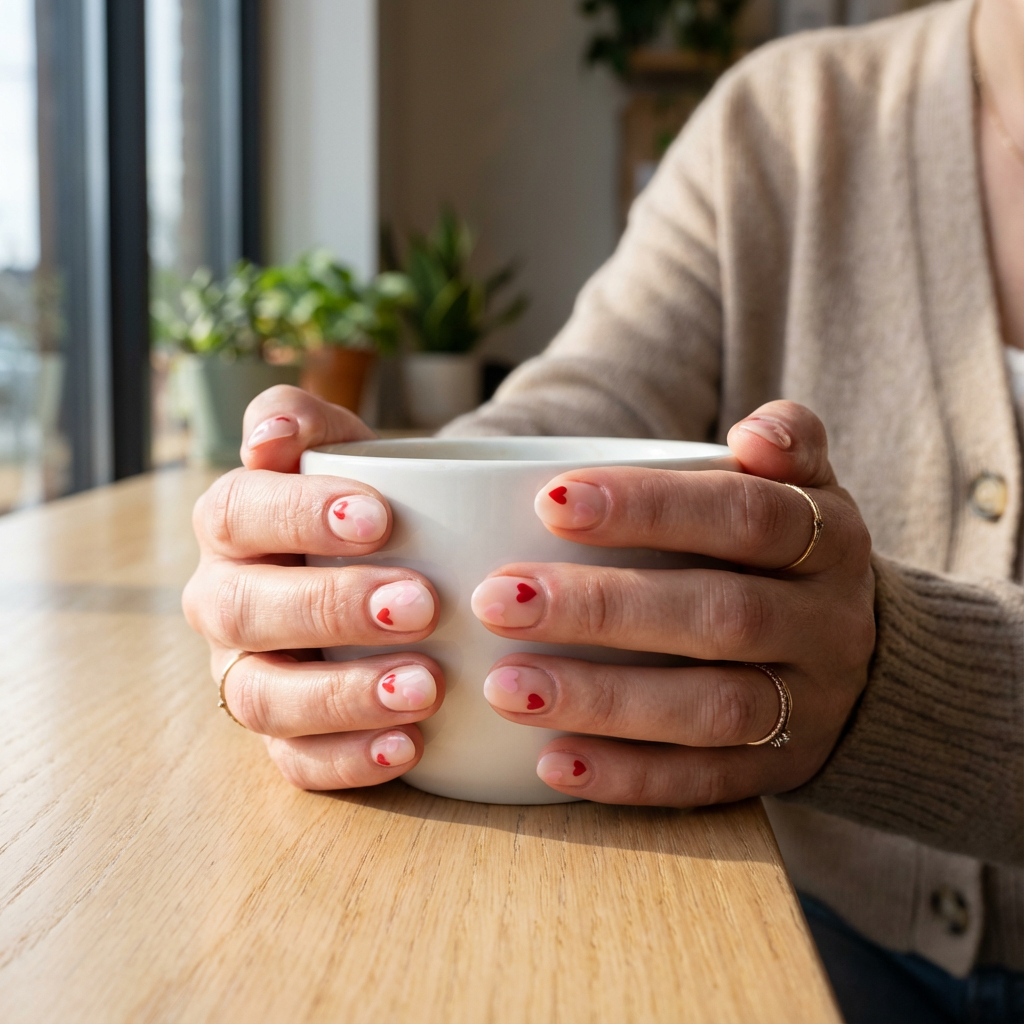
This is the manicure you wear all February. Tiny hearts, soft base, glossy finish — it’s sweet, simple, and always looks clean.
How-to
- Apply a sheer pink/nude base (two coats).
- Add one tiny red heart near the tip or side of each nail (toothpick works perfectly).
- Keep them slightly off-center for an effortless look.
- Let dry fully.
- Glossy top coat.
Mauve Whisper Heart
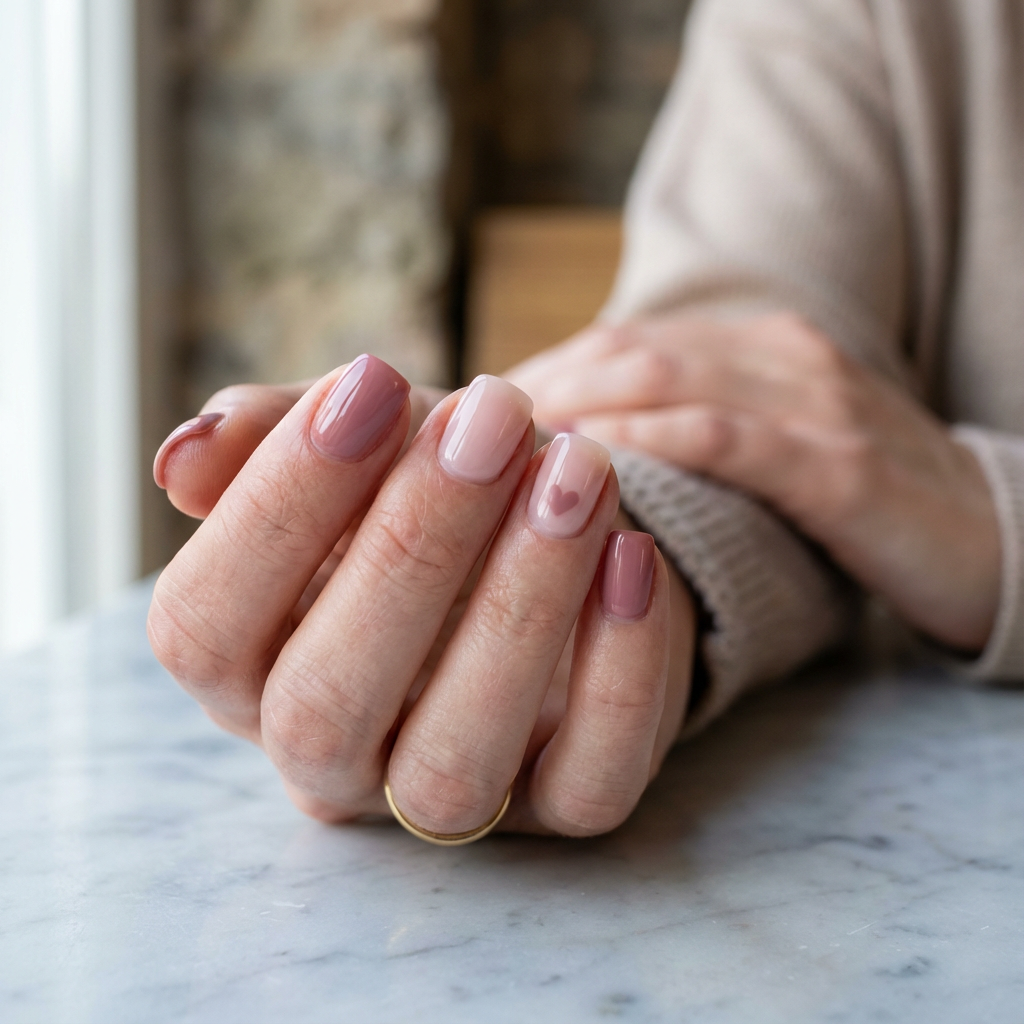
Soft mauves with one tiny heart detail feels so understated and pretty. It’s minimal Valentine for anyone who wants subtle, not loud.
How-to
- Paint a few nails mauve, and a few nails sheer nude (two coats each).
- On one nude nail, add a tiny mauve heart near the side.
- Keep the heart small and clean-edged (dotting tool helps).
- Let dry completely.
- Top coat for shine.
Wine & Blush Mix-and-Match Hearts
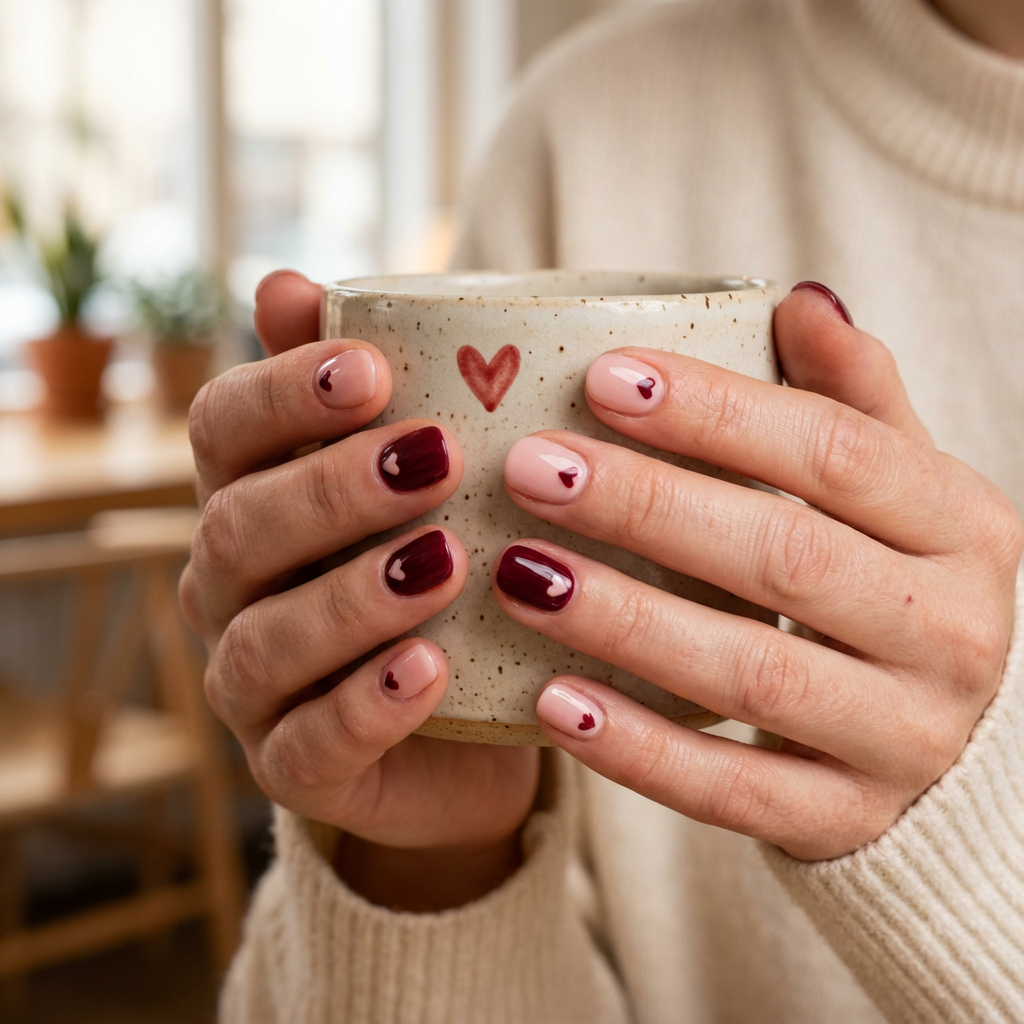
This one gives “cozy chic.” Alternating wine and blush is instantly cute, and the tiny hearts make it feel intentionally Valentine without going overboard.
How-to
- Paint alternating nails blush and deep wine (two coats).
- On blush nails: add a tiny wine heart near the tip.
- On wine nails: add a tiny blush heart (center or near cuticle).
- Let the hearts dry fully.
- Seal with glossy top coat.
Merlot Luxe Heart Studs
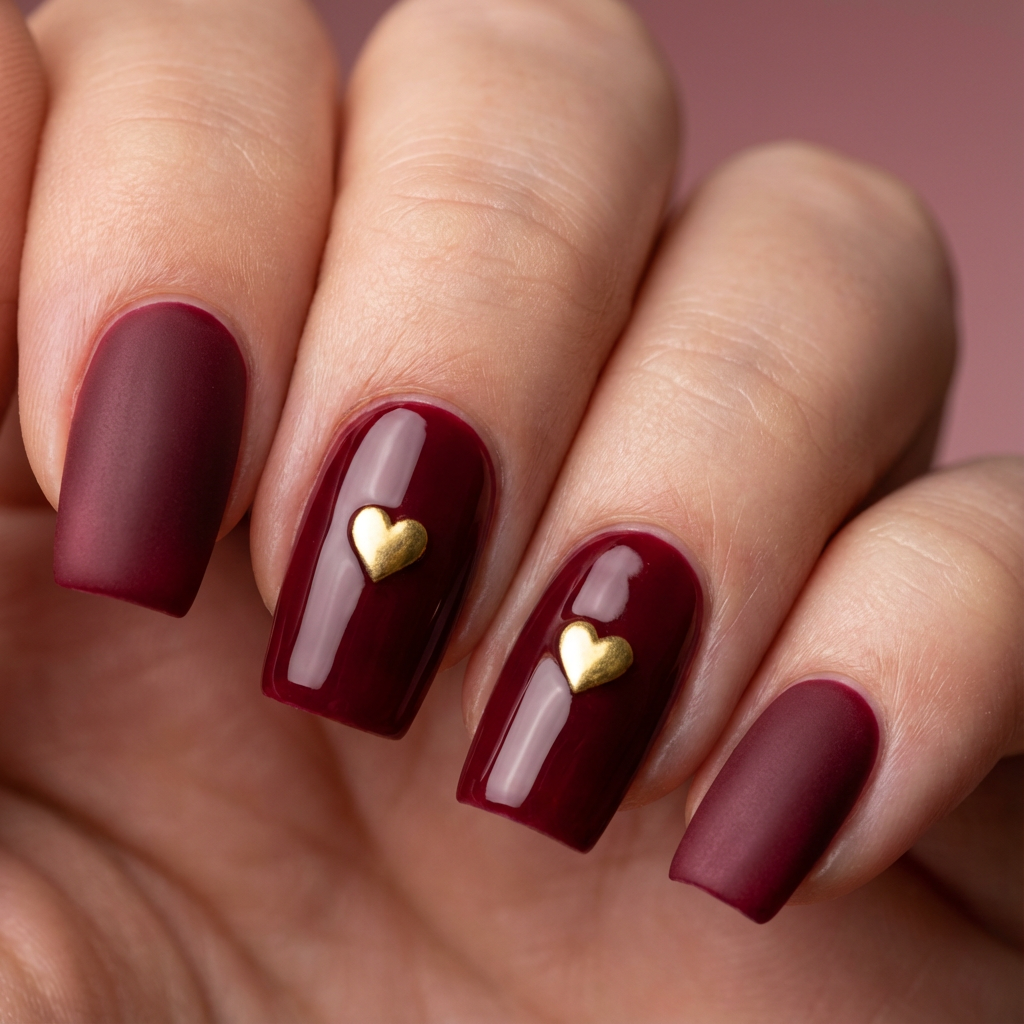
This set looks expensive. The matte/gloss contrast plus the gold hearts is such a grown-up Valentine vibe.
How-to
- Paint nails a deep merlot shade (two coats).
- Add matte top coat to a couple nails, keep others glossy.
- Place gold heart studs on 1–2 nails (press into slightly tacky polish or use nail glue).
- Add top coat around the stud edges to secure (don’t flood over it).
- Let fully dry.
Polka-Dot Valentine Cutie
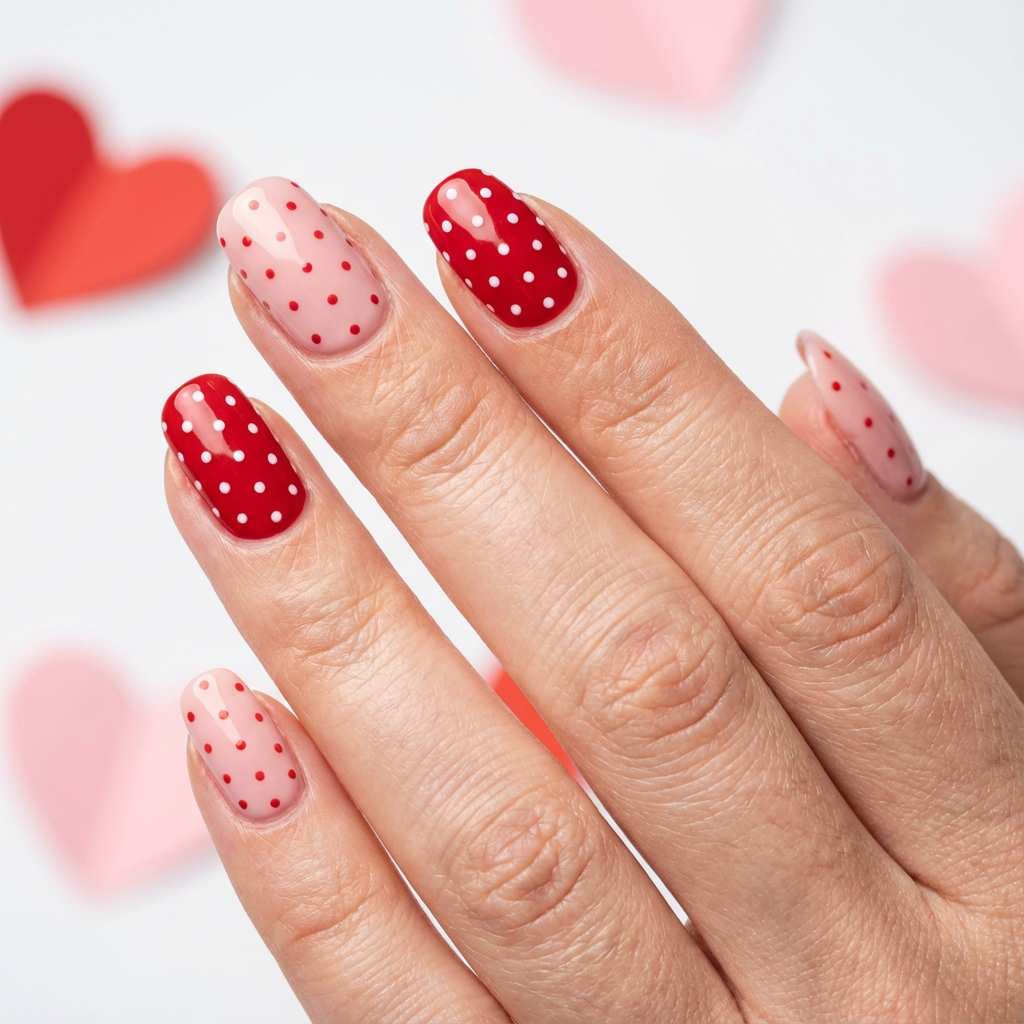
This is playful, Pinterest-perfect, and honestly one of the easiest designs to nail at home. The dots do all the work.
How-to
- Paint alternating nails red and pale pink (two coats).
- On red nails: add white dots using a dotting tool or bobby pin.
- On pink nails: add red dots the same way.
- Keep spacing even by doing dots in rows.
- Finish with glossy top coat.
Heart Cutout Cream Nails
Negative space nails are one of the easiest ways to make a Valentine manicure feel modern and fashion-forward. Instead of fully painting the nail, parts of the natural nail are left exposed to create clean shapes, contrast, and graphic detail.
This style works especially well for simple Valentine’s Day nails because it looks intentional without requiring complicated techniques. A delicate pink base paired with tiny cut-out hearts, half-moons near the cuticle, or soft graphic shapes keeps the look light and wearable.
For a bolder option, black negative-space nail art or deep red nails with exposed sections feel striking and editorial. If you like a playful retro vibe, ‘60s-inspired hearts or simple retro graphics add personality while still keeping the design clean.
Negative space designs also grow out beautifully, which makes them a great choice if you want your manicure to last longer without looking messy.
How-to
- Finish with a glossy top coat to seal the design and smooth transitions.
- Start with clean, bare nails and apply a clear or sheer base coat.
- Use nail tape, guides, or stickers to block off areas you want to leave exposed.
- Paint around the shapes using delicate pink, deep red, or black polish.
- Carefully remove guides while the polish is slightly tacky for crisp edges.
Classic Red Sweetheart Accent
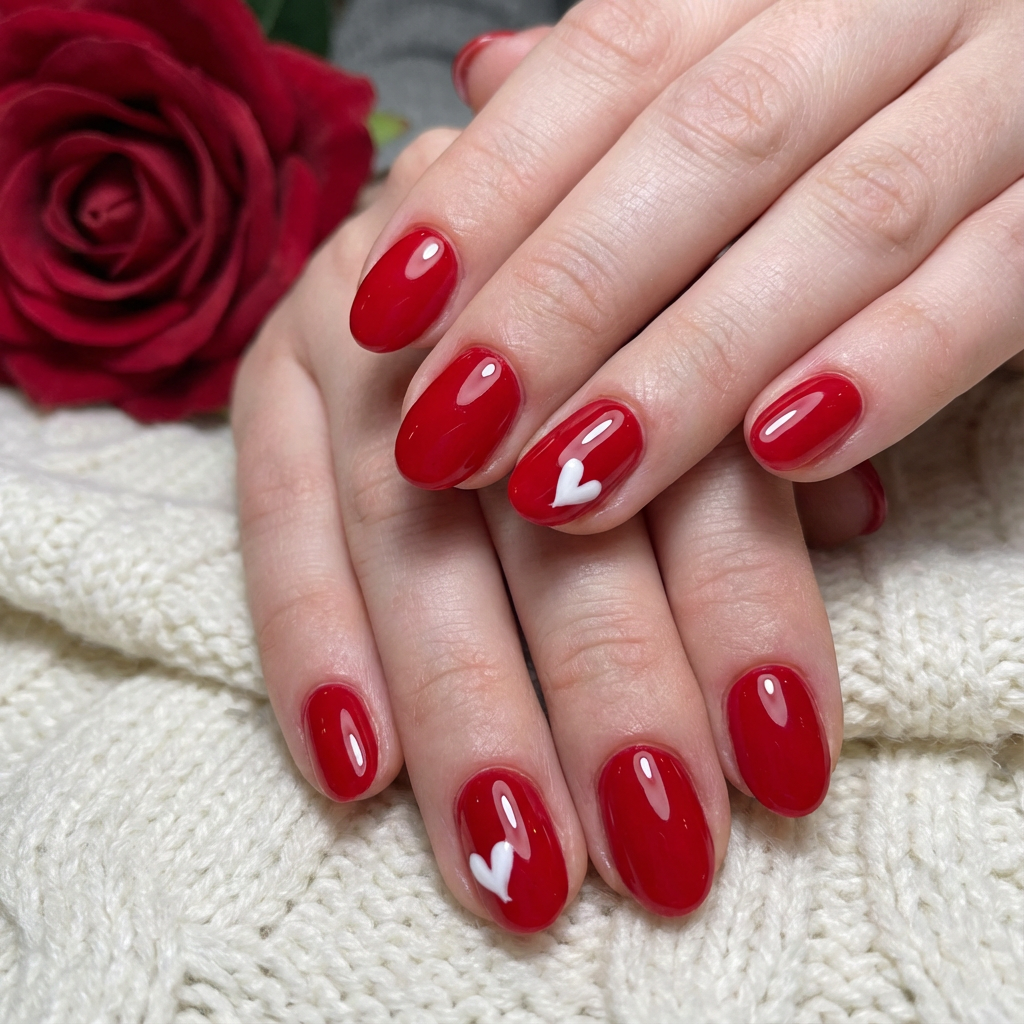
Timeless, simple, and always a win. The little white heart accent makes it feel Valentine without changing your whole vibe.
How-to
- Paint all nails glossy red (two coats).
- On 1–2 accent nails, paint a small white heart (dot-dot-drag method).
- Add a second coat to the heart for crisp opacity.
- Clean edges if needed.
- Finish with a glossy top coat.
Negative Space and Cut-Out Designs
Negative space nails are one of the easiest ways to make a Valentine manicure feel modern and fashion-forward. Instead of fully painting the nail, parts of the natural nail are left exposed to create clean shapes, contrast, and graphic detail.
This style works especially well for simple Valentine’s Day nails because it looks intentional without requiring complicated techniques. A delicate pink base paired with tiny cut-out hearts, half-moons near the cuticle, or soft graphic shapes keeps the look light and wearable.
For a bolder option, black negative-space nail art or deep red nails with exposed sections feel striking and editorial. If you like a playful retro vibe, ‘60s-inspired hearts or simple retro graphics add personality while still keeping the design clean.
Negative space designs also grow out beautifully, which makes them a great choice if you want your manicure to last longer without looking messy.
How-to
- Start with clean, bare nails and apply a clear or sheer base coat.
- Use nail tape, guides, or stickers to block off areas you want to leave exposed.
- Paint around the shapes using delicate pink, deep red, or black polish.
- Carefully remove guides while the polish is slightly tacky for crisp edges.
- Finish with a glossy top coat to seal the design and smooth transitions.
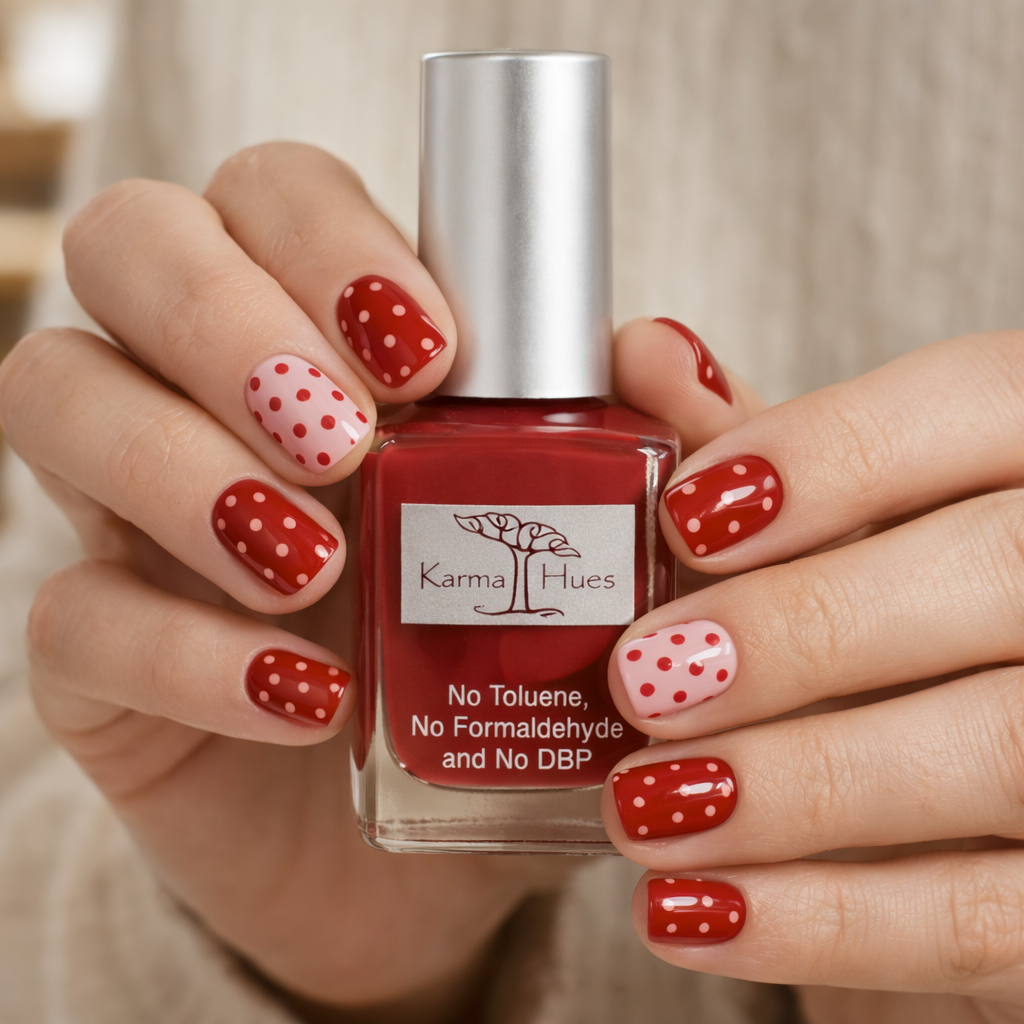
Long-lasting Non-Toxic Nail Polish Options
If you paint your nails often, switching to non-toxic nail polish is one of the easiest upgrades you can make. Traditional nail polish can contain harmful chemicals, including formaldehyde, toluene, and DBP. Non-toxic formulas are made without many of these ingredients and are a better choice for regular use.
The good news is that cleaner nail polish has come a long way. You do not have to sacrifice color, shine, or wear time to get a safer formula. Many non-toxic polishes apply smoothly, dry well, and last just as long as conventional options.
If you are creating simple Valentine’s Day nails, non-toxic polish works perfectly for soft pinks, classic reds, sheer bases, and minimalist designs.
Recommended Products
Below are some products worth checking out!


What to Avoid and What to Look For in Nail Polish
Not all nail polish ingredients are created equal. If you’re trying to choose safer, non-toxic options, it helps to know which ingredients are commonly flagged and what brands use instead.
❌ Ingredients to Avoid
- Formaldehyde and formaldehyde resin
- Toluene
- Dibutyl phthalate (DBP)
- Camphor
- Xylene
These ingredients are often linked to irritation, headaches, and long-term health concerns, especially with frequent use.
✅ Better Alternatives to Look For
- “5-free,” “7-free,” or “10-free” formulas
- Plant-based or bio-sourced solvents
- Low-odor formulas
- Vegan and cruelty-free labeling
No nail polish is completely chemical-free, but these features generally signal a cleaner formula.
Essential Tips for Easy Valentine’s Day Nails
🧼 Start With Clean, Dry Nails
Before applying polish, make sure your nails are immaculate. Oils from lotion or skincare can cause polish to peel faster. A quick swipe of rubbing alcohol or nail polish remover helps create a clean base.
🎨 Apply Thin, Even Coats
Thick layers take longer to dry and chip more easily. Two thin coats usually last longer and look smoother than one heavy coat.
🛡️ Always Use a Base Coat
A base coat helps polish stick to your nails and prevents staining, especially with red and darker Valentine shades. This step makes a noticeable difference in wear time.
✨ Seal Everything With a Top Coat
A glossy top coat protects your nail art, smooths over stickers or decals, and adds shine. Reapply every two to three days to help extend the life of your manicure.
⏳ Give Your Nails Time to Dry
Even quick-dry polish needs time to set fully. Try to avoid water, heat, or pressure for at least 30 minutes after finishing your nails.
🧤 Protect Your Hands During Daily Tasks
Wearing gloves while cleaning or washing dishes helps prevent cuts and strain on the back. Small habits like this can keep nails looking fresh longer.
🔧 Fix Small Chips Instead of Starting Over
If one nail chips, lightly file the edge, add a light coat of polish, and reseal with a top coat. Simple Valentine designs are easy to fix and still look intentional.
FAQs on Simple Valentine’s Day Nails
Prep matters more than design. Clean nails, smooth shaping, and pushed-back cuticles instantly make a DIY manicure look polished. Stick to simple designs like solid colors, French tips, or tiny hearts, and always finish with a glossy top coat.
You don’t need to be. Simple Valentine’s Day nails are meant to be minimal. Dots, small hearts, negative space designs, and color-blocked French tips are all beginner-friendly and very forgiving.
Most modern non-toxic polishes perform just as well as conventional ones when paired with a good base coat and top coat. Wear time typically ranges from five to seven days, sometimes longer with touch-ups.
They can be damaging if removed too quickly. To avoid damage, gently soak off press-ons and never pull them off. Stickers and decals are usually low-impact, especially when applied over a base coat.